Upgrading Carbide Base Insert
Instructions for upgrading Carbide Base footers to the Sapphire or Diamond versions by replacing the top insert on the footer. The Sapphire and Diamond inserts are available separately for any Carbide Base Evo footers.
Instructions for upgrading Carbide Base footers to the Sapphire or Diamond versions by replacing the top insert on the footer. The Sapphire and Diamond inserts are available separately for any Carbide Base Evo footers.

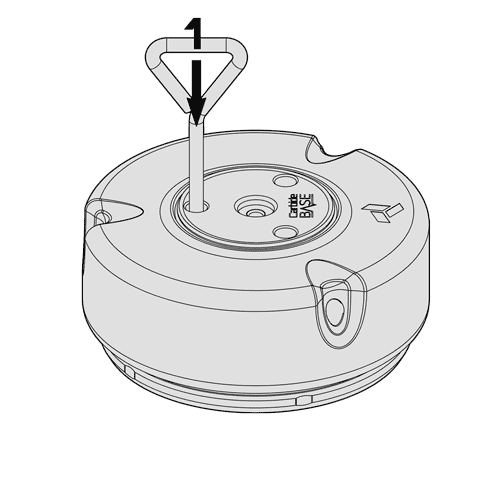
1 Insert supplied screwdriver down into each of the 3 top holes and unscrew the bolts housed within. Note: Once fully unscrewed the bolts will remain under the stainless steel top.

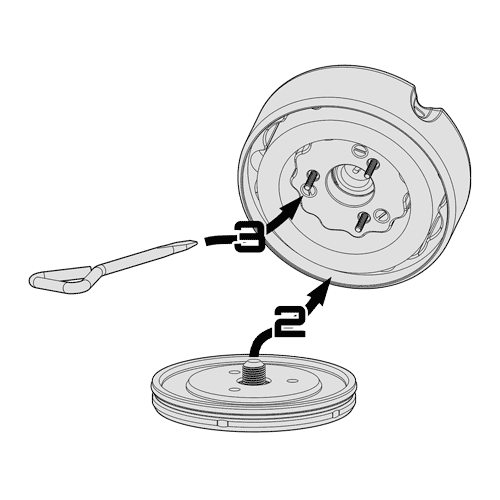
2 Pry apart the upper and lower portions to access the underside of the upper housing. Be patient prying apart as the ViscoRing™ can become tacky and slow to separate. The bottom portion can be partially unthreaded to increase prying leverage.
3 Use the supplied screwdriver to unscrew the 3 screws holding the standard insert to the upper housing.

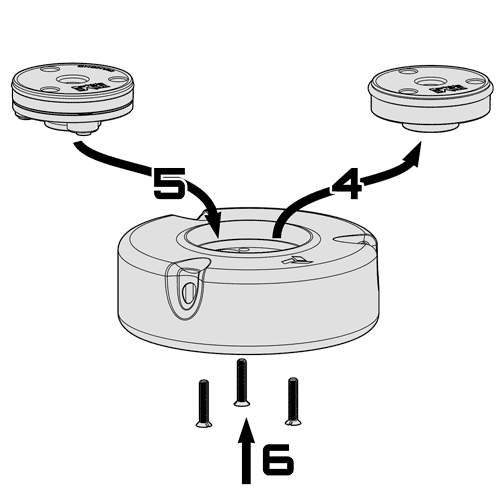
4 Remove the standard insert by pushing it out from the bottom center of the housing.
5 Insert and press down to fully seat the new insert into the opening on the top of the upper housing.
6 Use the supplied screwdriver to screw back in the 3 screws holding the insert to the upper housing.

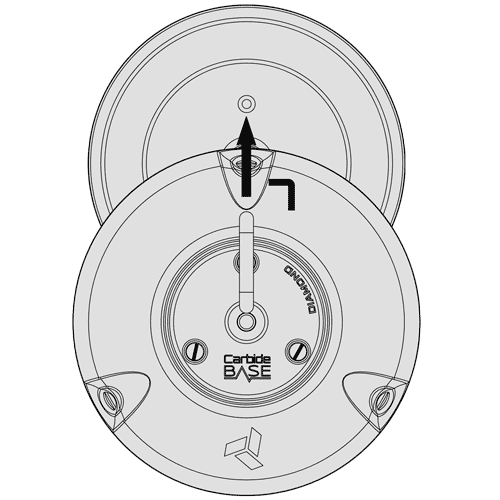
7 Align the top holes on the upper portion with the thread holes on top of the lower portion. Press the upper portion down over the top of the lower portion. Insert the screwdriver into the top holes and tighten the bolts housed within. If the bolts still do not align with their holes, remove the upper portion and try again.