Installing Bolts

Installing Bolts for Speakers

Instructions for installing bolts onto the Carbide Base footer. This allows the Carbide Base footer to screw into speakers and equipment in place of spikes or stock footers.


This mounting method is optional. Similar performance is possible by simply placing the tip of a speaker spike down into the hole on the top center of the footer.

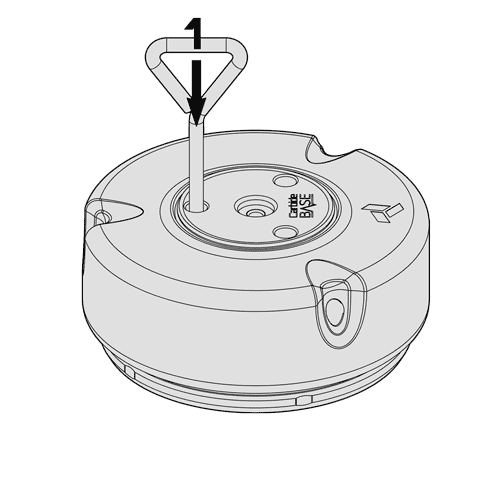
1 Insert supplied screwdriver down into each of the 3 top holes and unscrew the bolts housed within. Note: Once fully unscrewed the bolts will remain under the stainless steel top.

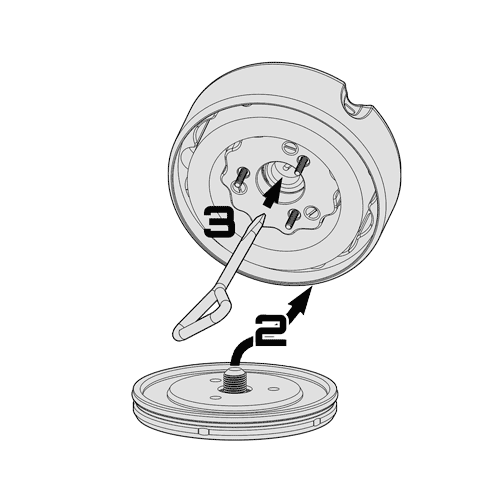
2 Pry apart the upper and lower portions to access the underside of the upper housing. Be patient prying apart as the ViscoRing™ can become tacky and slow to separate. The bottom portion can be partially unthreaded to increase prying leverage.


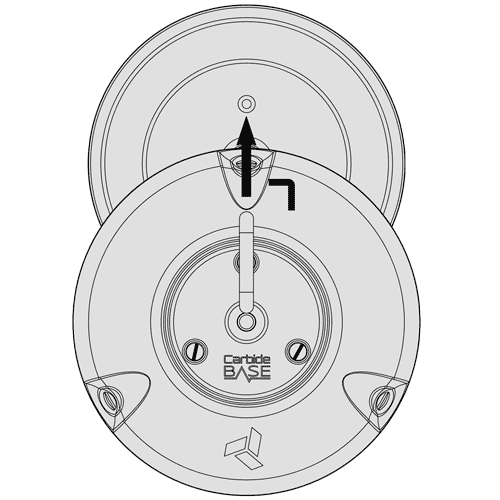
3 Insert the supplied screwdriver into the slot in the bolt retainer threaded into the bottom center of the housing.

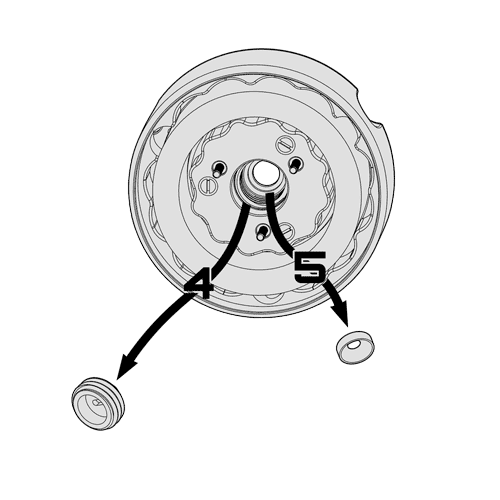
4 Unscrew the bolt retainer and set aside. Determine which bolt to use by hand screwing it into the open hole on the bottom of your audio equipment or speaker. Note: The bolts provided are ANSI B18.6.3 standard flat head machine screws. If another thread size or length is required they can be purchased separately from most bolt hardware stores.


5 (Optional) If the bolt is too large for the opening in the black nylon washer, remove it by pushing down on it from the top side. For smaller bolts sized M4, M6, #8-32, or 1/4"-20 leave the nylon washer in place. The nylon washer can be pressed back into place if needed.

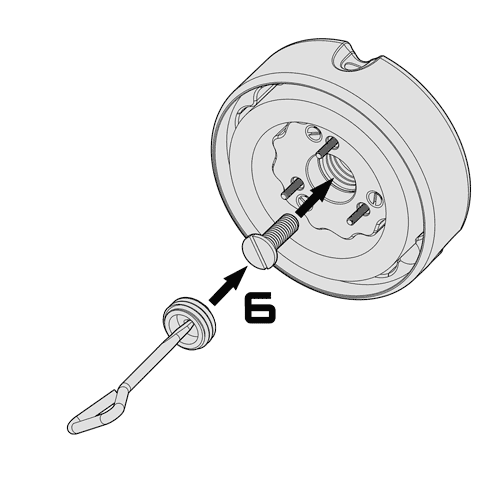
6 Insert the desired screw up into the bottom of the housing. While holding the bolt in place from the top of the footer, tightly screw in the bolt retainer behind it. Ensure that the bolt is protruding straight out of the top of the footer and that it does not twist in place. Note: If the bolt ever becomes loose, completely unscrew and remove the bottom of the footer. Retighten the bolt retainer by passing the screwdriver up through the bottom center hole.

7 Align the top holes on the upper portion with the thread holes on top of the lower portion. Press the upper portion down over the top of the lower portion. Insert the screwdriver into the top holes and tighten the bolts housed within. If the bolts still do not align with their holes, remove the upper portion and try again.

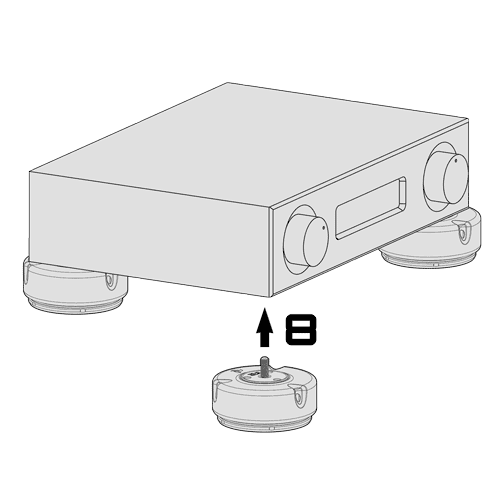
8 Screw the Carbide Base footer into the threaded holes on the bottom of the equipment or speaker.